Replacing The Stock Battery
By Andy Woo

Created : 971105
Last updated: 980513
Well, this is no 'biggie', but I thought I'd record the steps that I took to replace my stock battery. Note that when I did this, I only took the pictures AFTER I removed the original battery. I took pictures from the point when the battery had already been removed, until the end when the new battery was in place. For the sake of ease of use, I've reversed the order of the pictures, to show you how it went during the un-install. To re-install, just reverse the process.
So, here's the battery as you can plainly see. There is a plastic 'vent-shield' that gets in the way of removing the battery. It will be much more convenient to remove the battery if this were not in the way.
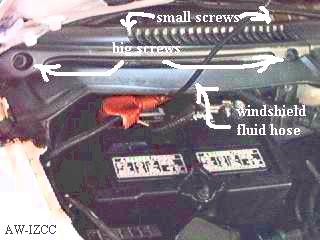
There is a windshield fluid hose clipped onto the plastic 'vent-shield'. Just gently unclip this from the vent-shield.
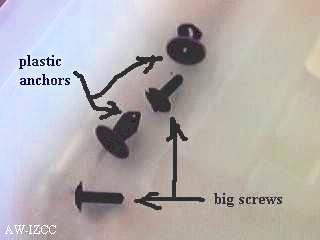
There are two big screws and two little screws holding the vent-shield in place. Remove these screws carefully. They are screwed into plastic anchors. Be careful not to drop these anchors in the car as you are removing the screws.
For each screw, there is a corresponding plastic anchor. Here are the two big screws and their corresponding plastic anchors.
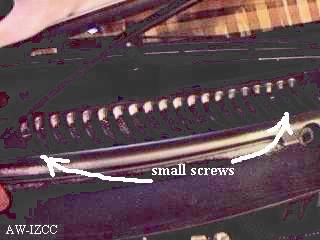
Here are the two small screws that have to be removed.
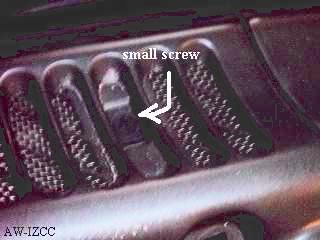
A close up of one of the small screws in case the picture was not clear.
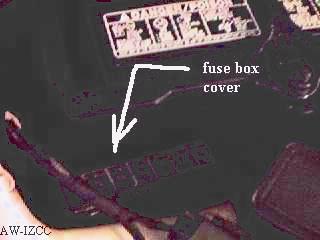
Now that you've removed the screws and unclipped the windshield fluid hose, you can easily slide the vent-shield off the car. Next, you should remove the fuse box cover next to the battery. This will get in the way anyways. Just remove it for convenience.
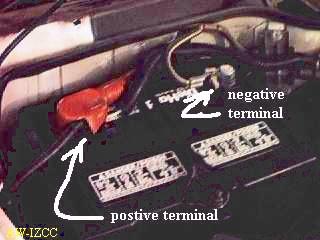
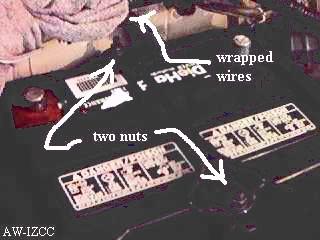
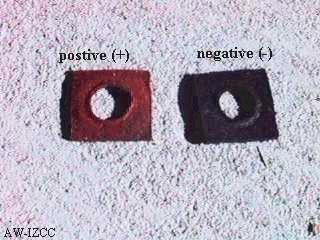
Now, remove the wires from the battery terminals. I removed the wires attached to the positive (+) terminal first and wrapped them in an old cloth and pushed them out of the way. I then removed the wires attached to the negative (-) terminal and wrapped them in an old cloth and pushed them out of the way.
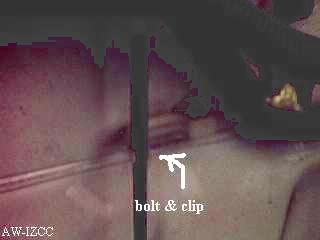
Next, there is a bar that holds the battery down. It is secured on either end with a nut which is attached to a long bolt.
BE CAREFUL HERE... as soon as you loosen the nut and remove it... the bolt will have a tendancy to drop straight down into the deep recesses of your car!! :(. This is especially true for the front bolt (the one closer to the bumper, further from the windshield). The rear bolt is clipped onto a fastener against the wall separating the engine from the interior. The front one is NOT secured.
What I did was, as I loosened the nut, I kept my hand on the bolt at the same time. If you do roughly a quarter twist of the bolt, you can actually remove the bolt from the car. Do so... as I can only imagine the nightmare if the bolt had slipped down into the car. After you have removed the restraining bar, simply angle the battery towards the front of the car a little, and then remove by pulling the battery up towards you. So, here lies the removed battery in it's jacket.
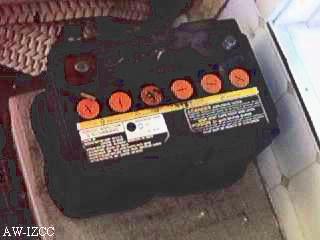
Remove the two terminal 'protectors', and clean them.
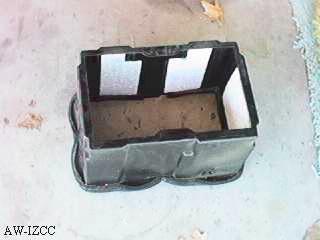
Remove the jacket from the battery by simply lifting the jacket up away from the battery.
The battery area in your engine bay should now look something like this. The rear bolt is still in place, but the front bolt has been removed. Although, in this picture, the bolt is currently NOT clipped against the fastener.

To replace with a new battery, simply reverse the steps in this procedure.
So, pretty easy no? Well, someone might find it useful one day.