 for his contribution. Andy 9710]
| You may need to change the rotors
if your current rotors are warped and have already been turned once or
twice or if you are putting on after market rotors. I am actually
changing out my cross-drilled Grip Racing rotors back to my stock rotors
here because the cross-drills are starting to develop very small radial
cracks. At this point they are not dangerous (less than 1 cm), however,
these rotors have seen a good amount of racing and are slightly warped
when they are not up to racing temp. Just getting old. So,
I decided to put the old ones back on which are perfectly straight,
just to make driving in town nicer.
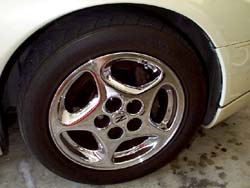
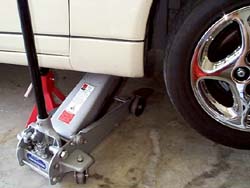
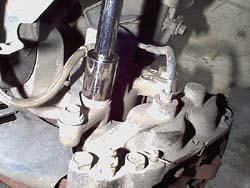
First, You need to break loose all of the lug nuts while the car is on the ground. The stock lugs are 21mm. (1.) Next, this is the safety step. If I am going to be jacking up the front, I always put a brick behind the opposite rear wheel as a precaution to keep the car from moving (always have the parking brake on and the car in gear). (2.) I also put a jack stand under the car for safety. After the wheel is in the air, you can finish removing the lugs and wheel. Go ahead and inspect the brakes for any thing out of the ordinary. This is also a great opportunity to replace the pads if they need it. I recommend Metal Master pads. They will really help your stopping power and are very fade resistant. (3.) There are two 21mm bolts on the back side of the calipers that attach the brake calipers to the suspension. These need to be removed so we can get the caliper off. The rotors are "floating", meaning there is nothing besides the brake caliper and the pressure between the wheel and wheel bearings keeping them in place. I would recommend going to Walmart and getting a torque wrench (~$30) with extension and 21mm socket if you don't already have them. The 21mm bolts holding the caliper in place are very tight and you need all the leverage you can get to remove them. (4.) After they are removed you just need to work the caliper off of the rotor. It can sometimes be a little difficult, just be careful not to twist and break the brake fluid line. It is also a good idea to support the caliper after it is off the rotor to take the pressure off of the brake line. (5.) I am actually using steel braided brake lines. They help a lot with improving the pedal feel and applying the braking pressure to the rotors instead of expanding rubber brake lines. Once you have the caliper off, just pull off the old rotor and put the new one on. Now you just have to reverse the process. Getting the brake caliper back over the new rotor and getting the 21mm bolts started is the hardest part of the process. With the torque wrench, torque the 21 mm bolts to about 100 lb/ft (the manual says 95 to 118 lb/ft). (6.) Put the wheel back on, tighten the lugs by hand, and lower the car back down. Be sure and torque the lugs to 75 - 85 lb/ft. (7.) That is all it takes. Just repeat the process for the other side. Put all the tools away and you are done! If you are putting on cross-drilled rotors, they usually have a bed-in process and break in period to follow. Just refer to the documentation that came with them. Russell "Silky Smooth" Siebert |
1.
2.  3. 3.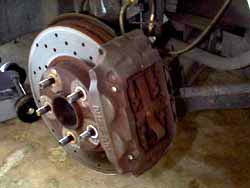 4.
4.
5. 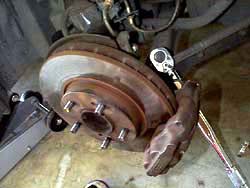
6. 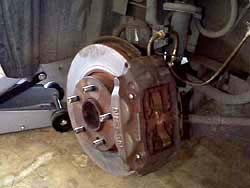
7. 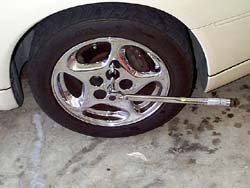 |