280ZX Engine Cooling System, Tips and Tricks
Contributed By: Joseph R. Demers, IZCC #4072

280ZX Engine Cooling System, Tips and Tricks
The Purpose of this page is to give the reader an understanding of how I have solved some of the Cooling System Problems for my 280ZX
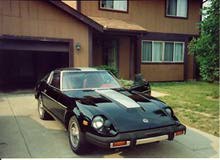 In 1990, I traded a set of speakers for a Texas area 1979 280 ZX and became its third owner. I spent two years completely rebuilding the car and will probably spend the rest of my life repairing, upkeeping and re-restoring it.
Some of the things contained in these pages cannot be done without risk and so I take no responsibility for damage to property or person caused by any ideas or information contained herein. I am not encouraging you to do any of this, I am only telling you what I have done:-)
Here is an index of what is to follow. For overheating problems, I have ended the section with a "Quick Fix" section on things to check, but I would read the Measurement section first.
Some attempts to remedy overheating problems include the addition of stock heat vents in the hood and after-market 4 core replacement radiators (where core number indicates the number of "layers" of cooling fins: stock radiators are 3 core).
Contained in these pages are my battles with overheating and the different (finally successful) methods I used to solve the overheating problem. Before launching into a test and solve discussion of problems, let me cite some possible problems and solutions (some of which I ran into). These will start with cheap and easy fixes and continue to more difficult and subtle issues. The symptom generally will be overheating, but in some cases may be more subtle, for these cases the symptoms will be described.
Measurement
From experience, I have found that with my '79 280 ZX the most important requirement to solving an overheating problem is making sure that one exists. Most cars today use a simple electronic method to measure water or head temperature
(I say most because I worked on a '72 Mercedes Benz 220 with an ether and diaphram set up! I clipped the tube containing the ether thinking it was a wire - ouch).
There are basically three components to the temperature measurement: a voltage regulator, a gauge and a sensor. First, because a cars voltage can vary considerably depending on load (12 to 14.5 Volts), it is necessary to regulate it. This is done with a voltage regulator. While I have not dissected a Z earlier than my '79, I assume that the 5 volt voltage regulator earlier Z's employ is the same. It is contained inside the gauge housing (not on back like most cars) and it is hard wired to the case behind the speedometer. Therefore, it is not a replaceable item (one of the few poorly designed features of the '79 280 ZX).
The regulator consists of piece of ~45 ohm wire wrapped around a bi-metalic strip with a contact at the end. When the contact is closed, current flows through the wire heating up the bi-metalic strip and lifting the contact point. When the contact point is lifted, surprise, no more current and the bi-metalic strip cools.
This means that the output from the voltage regulator is either the 12 - 14.5 volts mentioned earlier, or 0 volts. The reason it regulates is that if the applied voltage is higher, it doesn't matter, it just heats up faster lifting the contact more quickly. After a moment, the opening and closing of the contact "should" reach an equilibrium where the average voltage is 5 volts. Unfortunately, because this oscillation is so slow, you can not use an AC voltmeter to measure it, but would need an oscilloscope or an analogue voltmeter and a good guess.
Visit the Voltage Regulator Repair section for a discussion on how you can adjust your voltage regulator and test it. For the moment, however, lets just assume that you are getting 5 volts from it (if you were to try and measure it however, your multimeter will bounce between 12 volts and 0 making it difficult to read).
The next part of the circuit is the temperature gauge. It is an ammeter which is constructed similar to the voltage regulator. As a current heats a wire, it bends a bi-metalic strip and the needle moves. The gauge is in series with the temperature sensor, and as the sensor heats up, it's resistance drops. This allows a greater current to pass through the gauge and results in more needle deflection. As I have said, this is a typical setup and one that works very well - until your voltage regulator gets flaky.
The way to by-pass the voltage regulator and gauge is to measure the resistance of the sensor and convert it to temperature yourself. Unfortunately, the conversion chart isn't in the manual (another of my gripes with Datsun/Nissan). Therefore, it was necessary for me to remove the temperature sensor and make the measurements myself. Here is a chart showing the resistance as a function of temperature for the sensor.
If someone else has made these measurements let me know. Specially if you have different values! I have marked 205 degrees Fahrenheit because this is the what I believe the operating temperature should be. What this chart tells you is that if you measure a resistance across your temperature sensor of 26.5 and greater, you are fine. For instance, my temperature gauge in the car was reading 215 degrees, but my resistance was ~ 37.3 ohms or 185 degrees!
I was stressing for no reason. I have also put a chromel-alumel thermocouple into the thermostat housing and it has reported the same temperature to within a couple of degrees. Verification is always nice:) Instead of adjusting my voltage regulator, what I should have done was put a 26.5 ohm resistor in the circuit in place of the sensor and used the adjustment in the back of the temperature gauge to correct the reading.
Thermostats
Thermostats are cheap. If you think that the thermostat is your problem (car immediately overheats in city or on highway) then replace it. However, some thermostats are cheaper than others. Here I have a picture of an OEM Nissan thermostat and a Stant thermostat side by side.

The differences in their construction are obvious and surprising. First, and most importantly, the aperature on the OEM thermostat is around 30% larger! Assuming that they both open the same distance (I actually think the OEM opens further since it is taller) means that the flow through the OEM thermostat is much greater. Further, as you can see from the photo, the OEM has a rubber seal as opposed to the Stant's metal to metal seal (although some OEM thermostats are now metal on metal). This improves heatup and regulation by reducing leakage through the thermostat.
I have found that with a Stant thermostat in my 280ZX the engine temperature varies considerably (greater than 10 degrees Fahrenheit variation) while the OEM thermostat regulates the temperature very well (greater than 5 degrees Fahrenheit variation).
Generally, the thermostat is the problem with relatively new cars (i.e under 100,000 miles) if you belong to the 100,000+ club like the rest of us, then replace the thermostat, but don't hold your breath.
There are three different thermostats which you can buy for the '79 280ZX. It seems to me that this is a testament as to how poorly the car can regulate its temperature. I have tried both the tropical 76 degree celsius one and the normal 82 degree celcius one, and, obviously, my car ran cooler with the tropical thermostat. How much cooler I can't say since I only recently started actively monitoring the engine temperature with a chromel-alumel thermocouple.
Since my car is still running at about 185 degrees Farhenheit with the normal thermostat, I may try the fridged 86 degree celcius one. I don't know though, I would rather run slightly cool than slightly hot. It seems that the lower temperature thermostat allowed the car to vary in temperature more than the normal one.
I assume that this is because regardless of the temperature minimum your thermostat opens at, the engine and cooling system are design to allow optimal cooling at 205 degrees Fahrenheit.
Radiator
For cars over 100,000 miles, the radiator is usually the culprit of an overheating problem. There are a couple of indicators for a bad radiator. The first one you will notice is overheating in the city, but not at highway speeds. If this is occuring and you think that it is a radiator there is a simple test that you can perform.
First, while the engine is cold, remove the radiator fan. This is necessary regardless of whether you will check from the front or back of the radiator (those of us with AC must check from the back or have very skinny hands). I find it easiest to remove both the clutch and the fan and hold the water pump pulley in place with some metric bolts or nuts (don't forget lock washers), but you can probably just remove the blade from the clutch. Then start the car. It is important that while you do this you regularly monitor the engine temperature or have someone else monitor it. Don't let the engine overheat!
As the engine warms up feel the surface of the radiator; it should heat up evenly. If you find cold spots, this indicates that passages are blocked. I have been told this typically occurs in the center of the radiator. If you do find cold spots then it is time for a new radiator or a recore. Removing the fan helps increase the temperature difference between the hot and cold spots making it easier to diagnose.
Motorsports offers a 4-core radiator for not much more than you would pay for the stock one. This will improve your cooling capabilities by increasing the surface area available for heat dissipation. Be warned, however, that this places the surface of the radiator dangerously close to the fan and clutch assembly.
In a hard stop I actually had fan-to-radiator contact. Fortunately, I didn't puntcure the radiator, but I did mar the surface. It was necessary for me to remove my fan and clutch assembly and replace it with a set of electric fans (more on that in the next section).
Now that I have tracked my over heating problem to a faulty regulator, I wish I had simply put the stock radiator into the car and saved myself a lot of headaches. Before deciding to purchase the 4-core upgrade, consider how you drive the car and how much modification you want to make to the engine compartment to get it to fit. If you don't have AC and/or turbo I wouldn't even consider the 4-core replacement.
Invariably, one of the first items that gets replaced when trying to fix an overheating problem is the fan clutch. Unfortunately, it rarely does any good. Whatever you do, DO NOT ATTACH THE FAN DIRECTLY TO THE PUMP SHAFT!
The first instinct is to remove the clutch and see if the overheating problem goes away. If you remove the clutch and attach the fan directly to the pump shaft there is a very good chance that the pump shaft will shear and you will be left with a fan through the hood, or more likely through the radiator.
I have been warned repeatedly about this. What I believe is that the clutch buffers the angular momentum of the fan during hard acceleration/de-accelerration of the engine. This permits the use of a smaller diameter shaft in your water pump. I am not sure about the reasons, just about the results.
If you want to test your fan clutch, it is not even necessary to remove it. While the car is cold, and turned off, try and turn the fan. It should turn easily. Then start warming up your car. As you stop the engine and test the fan, it should get progressively harder and harder to turn freely. It will never lock up completely, but you can tell that the clutch is working.
One of the first questions you will be asked when talking to a mechanic about an overheating problem (after going through all the usual problems) is if the fan shroud is in place. On late model RX7's the shroud and "belly pan" are necessary and the car will overheat without them. On the 280ZX they will improve cooling, but I have never tested how effective they are.
Dick Denno (IZCC #452) has an article posted on the Z Home Page addressing the shroud and belly pan, but the only modification he states had an effect was the addition of a front air dam. My opinion is that if you have the parts then use them, they cannot hurt.
The shroud will help improve efficency by reducing the amount of air re-circulating around the fan tips and by ducting air through the entire surface of the radiator.
The belly pan will improve passive flow at highway speeds. Dick Denno also mentions how hood vents helped reduce trapping the heat from the exhaust manifold. Since the hood vents were stock on my car, this was not an improvement option for me.
I have considered using headers with header wrap to both improve my horsepower and try to reduce the under-the-hood temperatures, but have not done this yet. I have read somewhere (Motorsport?) that header wrap can significantly reduce radiation from the header, but it seriously degrades the life time of the headers making them last only 2 years. [Jet Hot Coating for headers - was invented to solve this problem, keeps more heat inside the header and prolongs the life expectancy...ed]
One thing that you should always keep an eye on is the
exhaust bolt/nut directly under the thermostat housing. On my '79
280ZX this tends to loosen up and allow hot exhaust gas to breathe onto
the thermostat housing causing false temperature readings.
Spark Timing
Suprisingly, spark timing can effect operating temperature of your Z. This
is specially true at highway speeds (and above...) and not as important
for around the block driving. For a stock 280 ZX, the spark should occur
at 12 degrees before top dead center (for those of us who have degree'd
an aftermarket competition camshaft, this is subject to change...) Retarding
the spark (say 8 degrees BTDS) effectively makes the air/fuel mixture richer.
While advancing the spark (16 degrees BTDS) effectively leans the mixture.
An overly lean fuel mixture can make an engine run hot.
Exhaust
Gas Recirculator (EGR)
The EGR valve bleeds hot exhaust gas back into the manifold after the car
has warmed up. Counter-intuitively, the addition of hot, pre-burned gas
actually lowers the temperature of the combustion process. This is how
it reduces the car's emissions. By lowering the combustion temperature,
you reduce the amount of nasty radicals (pollution) which can form at higher
combustion pressures/temperatures (this is also why high compression engines
aren't produced any more). I have been told by an ASE Certified Master
Technician that this process can actually lower the burn temperatures up
to 1000 degrees Farhenheit! While I find this difficult to believe, it
makes obvious sense to check your EGR valve if you are having overheating
problems. I have found that it is actually the temperature sensitive vacuum
switch which usually fails.
An easy way to quickly check the EGR valve is to connect a hose to the vacuum nipple and suck on it (no sexual implications...:-) If air moves easily, the EGR valve is punctured and needs replaced. If you can pull a good vacuum and can watch the diaphram of the EGR move, it is fine. This does not mean that your EGR valve is working properly, however.
As I mentioned earlier, the EGR is only allowed to function when the car is at operating temperature. To prevent cold operation, there is a temperature controlled vacuum switch which is controlled by the water temperature. Following the vacuum line back from the EGR, it immediately encounters a vacuum amplifier (rarely fails) and then the vacuum switch.
The vacuum switch is mounted under the fast idle by-pass valve and has hoses connecting it to the thermostat housing. The way you test this is just the opposite of the EGR. Connect two vacuum lines to the nipples on the vacuum switch and put one of them into a glass of water. Before warming up the engine, blowing on the free vacuum line should not produce bubbles in the glass of water. After you warm up the car to operating temperature, however, blowing on the free vacuum line should produce bubbles in the glass of water. If you do not see bubbles, the vacuum switch has failed - you can replace or by-pass it.
Head Gasket
One of the overheating problems that I encountered was a blown head gasket.
It was only 'slightly' blown, however and the usual test of starting the
car, allowing it to run for a couple minutes and checking for pressure
in the water jacket didn't disclose anything.
Usually, if you have a blown headgasket, during this test you will hear gas escaping the radiator as you remove the cap. The indicator, I felt, was the overheating at highway speeds, but not at around town driving. I would not suggest that if your car is overheating at highway speeds that you pull the head and look for a blown headgasket though!!! My final indicator was the radiator fluid leaking out from between the head-block surface.
Quick Fixes
Here are a couple of things to check real quick - who knows you might get lucky.
1) Use method above to check actual engine temperature.
2) Exhaust bolt/nut under thermostat housing is loose.
As of 7 July 98 -cjb